Android: Fixing the API 12 Demos project errors
Posted by Dimitri | Sep 22nd, 2011 | Filed under Programming
This post shows how to fix some of the most common errors when creating a project with the API 12 (Android 3.1) demos in the Eclipse IDE. The API samples comes bundled with the Android SDK and are a set of Activities that exemplifies how to do almost anything in Android. Following the instructions described at the official documentation to create a new Eclipse project with the API demos 12 code will cause a lot of errors.
So, if there is a list of them appearing at the Problem tab, like the one below:
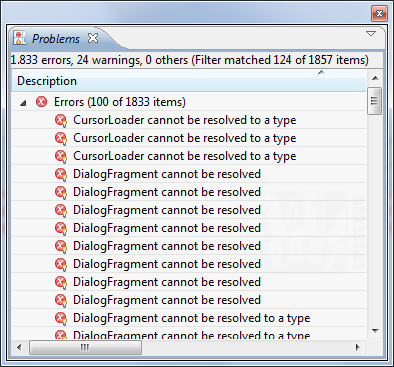
These errors were generated after creating a project using the Android API 12 Demos.
Don’t worry, the solution is actually quite simple. However, it might make Eclipse crash, forcing the IDE to close abruptly, resetting all Perspectives to their defaults. That said, you might want to read this post on iThoughts website, which explains how to increase Java’s Virtual Machine initial and maximum heap sizes, just in case.
The first step to solve the errors is to open the Android SDK and AVD Manager. It’s located at the root of the Android SDK folder. After it’s open, click on Installed Packages and locate the Android Compatibility Package on the list. If it isn’t there, just download it using the manager.
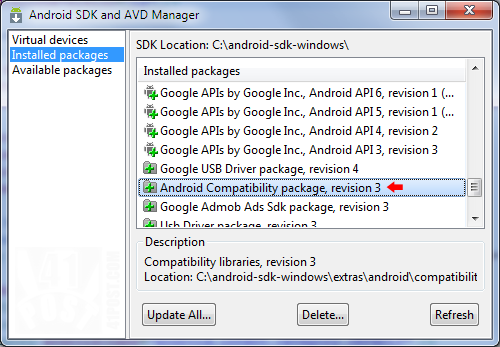
Try to locate this package. If it's not there, download it.
Then, open Eclipse and select File->New->Android Project. At the New Android Project dialog, select Create Project from existing sample and choose the Build Target API 12 from the list. Next, select ApiDemos from the drop down list. The last thing to do at this dialog is to give the project a name, such as ApiDemos12, as shown:
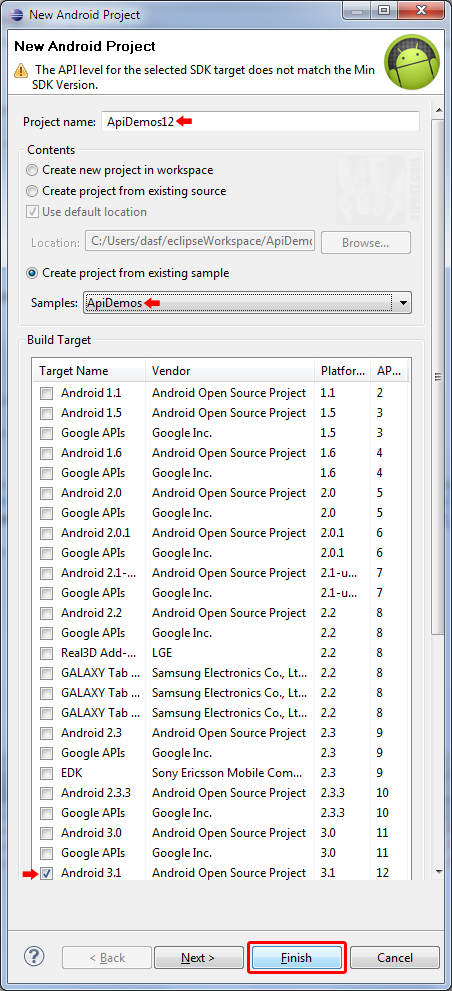
Make sure to select the Target API before choosing 'APIDemos' from the drop down list.
Then, just click on the Finish button. A project will be created with Android’s 3.1 samples. A lot errors might appear after the workspace have finished building, such as the ones displayed on the first image in this post. To start solving them, open the AndroidManifest.xml file. Change line 39 from:
<uses-sdk android:minSdkVersion="4" />
To:
<uses-sdk android:minSdkVersion="12" />
The last thing that needs to be done it to right click your project folder and select Android Tools->Add Compatibility Library. It will add the missing libraries, causing all the unresolved type errors to disappear. It’s important to note that the errors won’t instantly be fixed: it takes some time for all of them to be removed from the Problems list, as Eclipse needs to rebuild the workspace. This is when the IDE might crash and/or throw some errors. If you are good to go, just run the API Demos 12 project, otherwise, just close Eclipse.
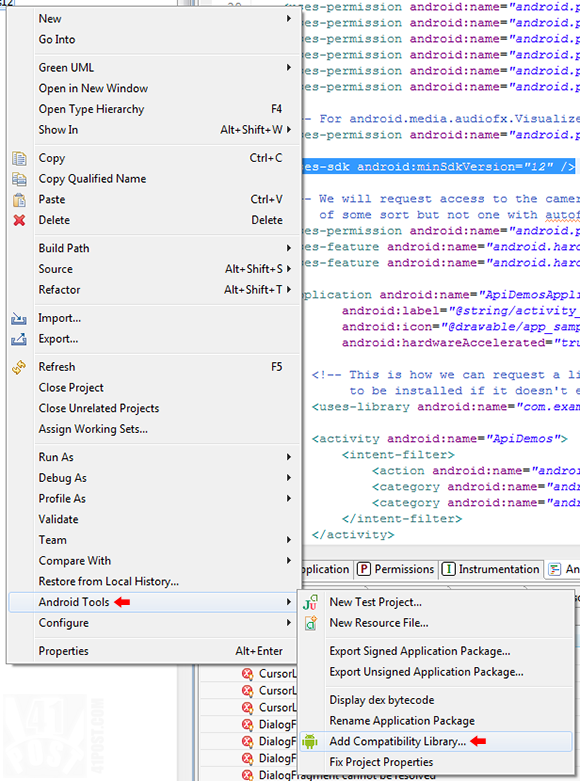
Add the Compatibility Library to the project, as displayed at this image.
If Eclipse is starting to complain about the Java Heap space, with error messages like:
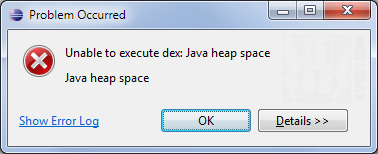
After importing the Compatibility Library, Eclipse can throw error messages like this one.
Just increase the Java Virtual Machine maximum and initial heap sizes, by editing the eclipse.ini file as described in this post.
Still, if there are some problems executing the newly created project, delete it from eclipse flagging that the contents should also be removed from the disk. Open the Android SDK and AVD Manager one more time, click on Installed Packages and locate the Samples for SDK API 12, revision 1 package and then press the Delete button. Finally, in the Manager select Available Packages and install the SDK samples again and try to import the project in Eclipse.
Be the first to leave a comment!


