Android: Creating a WebView dialog
Posted by Dimitri | Feb 21st, 2012 | Filed under Featured, Programming
This Android post shows how to display a WebView inside a Dialog, that renders a website to the user. Since the WebView can load just about any web page, it’s possible to provide any information to users without launching the web browser, so they never have to leave the application.
For this tutorial, all code had been developed and tested in Android 2.1, both on an emulator and on a real device. As usual, an example application with the code featured in this tutorial is available for download at the end of the post.
The first thing required to place a WebView inside a dialog is to create a custom Dialog. After that, a WebView can be added to it. The easiest way to do that is to create a new Android layout file (in Eclipse, just right click the Project folder and select New -> Android XML file). Then, add the following code:
<?xml version="1.0" encoding="utf-8"?>
<LinearLayout xmlns:android="http://schemas.android.com/apk/res/android"
    android:layout_width="fill_parent"
    android:layout_height="fill_parent"
    android:orientation="vertical" >

    <RelativeLayout
        android:id="@+id/rl_relativeLayout"
        android:layout_width="fill_parent"
        android:layout_height="250dip"
        android:layout_gravity="center_horizontal"
        android:layout_margin="10dip" >

        <TextView
            android:id="@+id/tv_title"
            android:layout_width="wrap_content"
            android:layout_height="wrap_content"
            android:text="Latest Updates:"
            android:textAppearance="?android:attr/textAppearanceMedium"
            android:textStyle="bold" android:layout_centerHorizontal="true"/>

        <WebView
            android:id="@+id/wb_webview"
            android:layout_width="fill_parent"
            android:layout_height="fill_parent" android:layout_below="@id/tv_title" android:layout_marginTop="5dip"/>
    </RelativeLayout>

    <Button
        android:id="@+id/bt_close"
        android:layout_width="fill_parent"
        android:layout_height="wrap_content"
        android:layout_marginLeft="10dip"
        android:layout_marginRight="10dip"
        android:text="Close" />

</LinearLayout>
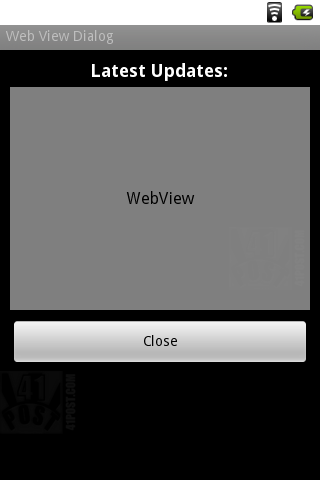
There’s nothing special about this layout XML file. The root of the layout is just a LinearLayout ViewGroup and a RelativeLayout that holds a TextView and the WebView. In Eclipse, this layout preview looks like this:

The preview won't show the layout as a Dialog, even if the Theme is set to 'Theme.Dialog'. But don't worry, it will be correctly rendered as one.
For this tutorial, a main.xml has also been created. It’s the first View that the application displays and it just holds a button that launches the WebView dialog. Since there’s nothing more than that, there’s no need to explain it in detail.
Now, the code for the Activity that launches those Views will just initialize and set some parameters for the Dialog and WebView objects, such as defining if the dialog can be dismissed and some display properties and features of the WebView, such as hiding the horizontal bars and enabling JavaScript. Here’s the code:
package fortyonepost.com.webviewdialog;

import android.app.Activity;
import android.app.Dialog;
import android.os.Bundle;
import android.view.View;
import android.view.Window;
import android.view.View.OnClickListener;
import android.webkit.WebView;
import android.widget.Button;

public class WebViewDialogActivity extends Activity
{
	//Create a dialog object, that will contain the WebView
	private Dialog webViewDialog;
	//a WebView object to display a web page
	private WebView webView;

	//The button to launch the WebView dialog
	private Button btLaunchWVD;
	//The button that closes the dialog
	private Button btClose;

    /** Called when the activity is first created. */
    @Override
    public void onCreate(Bundle savedInstanceState)
    {
        super.onCreate(savedInstanceState);
        setContentView(R.layout.main);

        //Inflate the btLaunchWVD button from the 'main.xml' layout file
        btLaunchWVD = (Button) findViewById(R.id.bt_launchwvd);

        //Set the OnClickListener for the launch button
        btLaunchWVD.setOnClickListener(new OnClickListener()
        {
			@Override
			public void onClick(View v)
			{
				//Display the WebView dialog
				webViewDialog.show();
			}
		});

        //Create a new dialog
        webViewDialog = new Dialog(this);
        //Remove the dialog's title
        webViewDialog.requestWindowFeature(Window.FEATURE_NO_TITLE);
        //Inflate the contents of this dialog with the Views defined at 'webviewdialog.xml'
        webViewDialog.setContentView(R.layout.webviewdialog);
        //With this line, the dialog can be dismissed by pressing the back key
        webViewDialog.setCancelable(true);

        //Initialize the Button object with the data from the 'webviewdialog.xml' file
        btClose = (Button) webViewDialog.findViewById(R.id.bt_close);
        //Define what should happen when the close button is pressed.
        btClose.setOnClickListener(new OnClickListener()
        {
			@Override
			public void onClick(View v)
			{
				//Dismiss the dialog
				webViewDialog.dismiss();
			}
		});

        //Initialize the WebView object with data from the 'webviewdialog.xml' file
        webView = (WebView) webViewDialog.findViewById(R.id.wb_webview);
        //Scroll bars should not be hidden
        webView.setScrollbarFadingEnabled(false);
        //Disable the horizontal scroll bar
        webView.setHorizontalScrollBarEnabled(false);
        //Enable JavaScript
        webView.getSettings().setJavaScriptEnabled(true);
        //Set the user agent
        webView.getSettings().setUserAgentString("AndroidWebView");
        //Clear the cache
        webView.clearCache(true);
        //Make the webview load the specified URL
        webView.loadUrl("file://sdcard/html/updates.html");
    }
}
At the beginning of this Activity, four View objects are being declared: a Dialog, a WebView and two Button objects (lines 15 through 22). Next the OnCreate() method is being defined. Inside it, the first View to be initialized is the one that launches the WebView dialog. It’s being inflated from the main.xml file (line 33). Then, a new OnClickListener is set for this button, defining that the dialog should be displayed if the former ever gets pressed (lines 36 through 44).
Next, the webViewDialog is initialized by passing the current context to the constructor (line 47). Right after that line, the title of the currently initialized dialog is removed (line 49) and it’s inflated with the View elements defined at the webviewdialog.xml file (line 51). Lastly, this Dialog instance is set to be dismissed when the back key is pressed (line 53).
The second Button instance is then initialized by inflating it with data from the webviewdialog.xml file (line 56). Note that, instead of calling the findViewById() method from WebViewDialogActivity, it has been called from the Dialog instance (webViewDialog). That’s because the ViewParent for this View is webViewDialog, and not the root View of this Activity. Just like the first button, the OnClickListener is being defined, however, this time, it assigns a different action to the button: it should dismiss the dialog when it has been pressed (lines 58 through 66).
Finally, the WebView object is initialized (line 69). Some of its settings are defined on the following lines of code. These settings consists of the scrollbar behavior that is being set to appear on the WebView, regardless of the user interaction and the horizontal scrollbar is being hidden (lines 71 and 73). Moreover, the JavaScript capabilities are enabled for this WebView and the user agent name is set to AndroidWebView (lines 75 and 77).
When it comes to rendering a simple web page, enabling JavaScript for this type of View is optional, so as setting the user agent name. However these two actions are vital for this example, as they will serve the same purpose when loading the web page: when loading the page, JavaScript will detect the user agent, assigning a specific CSS file for the WebView . That way, an existing website can be rendered correctly inside the WebView’s limited area. We will get back to this later on this tutorial.
Back to the code, lines 79 and 81 clear the current cache and make the defined URL to be loaded by the WebView. For this example, the WebView will load a HTML located at the html folder at the root of the SD card. This folder has also been included in the source code. Therefore, to correctly execute the example project, push the folder onto the target device using ADB commands or Eclipse. It’s worth mentioning that the WebView can load any offline and online URL, for example www.41post.com, just by passing it to the loadUrl() method – it doesn’t have to necessarily be a local HTML file.
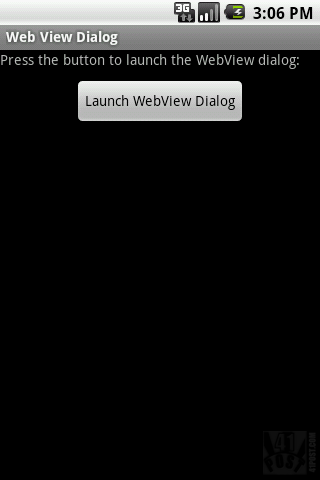
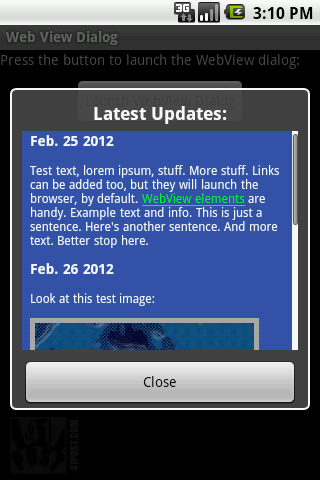
After placing the html folder in the SD card and executing the app, you will get the following:

Screenshot of the first View displayed by the application. Press the button, and it will launch the WebView dialog.

Screenshot of the WebView dialog. It renders the web page just like the browser.
After inspecting the contents of the html folder, you will see that there are two CSS files: style.css and styleandroidwv.css . The first one is the style CSS used when the page is loaded from a web browser or any other user agent. The second CSS is one specifically tailored for the WebView. Now all it must be done is to find a way for the HTML to load the correct CSS file based on the user agent name. To do that, add the following JavaScript inside the header, just like in the updates.html file:
	<script type="text/javascript">
		<!--
			if ( (navigator.userAgent).search("AndroidWebView") > -1)
			{
				//Load Android WebView specific CSS
				document.write("<meta name=\"viewport\" content=\"target-densitydpi=medium-dp\" /> <link rel=\"stylesheet\" type=\"text/css\" href=\"styleandroidwv.css\" />");

			}
			else
			{
				//Load default CSS
				document.write("<link rel=\"stylesheet\" type=\"text/css\" href=\"style.css\" />");
			}
		//-->
	</script>
This code basically checks whether the user agent is AndroidWebView. Case that’s true, the styleandroidwv.css file is loaded. If it’s not, the page is rendered normally with the style.css file. Therefore, the user agent name for the WebView has to be unique in order for this type of filtering to work.
By doing so, it’s possible to correctly render an existing website inside a WebView with minor alterations to the existing HTML and scripts placed on the sever side. At the official WebView Documentation page, there are other examples of DOM meta tags that can be used to further customize how the website is displayed based on the device screen density. Also, it explains how the elements rendered by the WebView are scaled by default.
One last thing: don’t forget to add the Internet access permission to the manifest file, like this:
<uses-permission android:name="android.permission.INTERNET"/>
That’s it!


Is there any way to implement the back button for the webview? I.E. if I have an html file that I’m loading that has links in it, once a link is clicked how do I go back to the previous page?
I’ve tried adding:
@Override
public boolean onKeyDown(int keyCode, KeyEvent event) {
if ((keyCode == KeyEvent.KEYCODE_BACK) && webview.canGoBack()) {
webview.goBack();
return true;
}
return super.onKeyDown(keyCode, event);
}
to the end of the .java file, but it does nothing. I’d rather have the user click the “close” button to dismiss the dialog, and the back button to go back in the webview.
how to full screen webview in above project when i click on lunch webview dialog?