
Android: hexadecimal color input using an EditText
Posted by Dimitri | Feb 25th, 2013 | Filed under Featured, Programming

This Android programming tutorial shows how to create a simple application that takes the value of a hexadecimal color at an EditText field and displays it as an ImageView. In order to do so, this post goes into detail on how to correctly parse the EditText String as 32 bit hexadecimal Integer. Additionally, it explains the part of the code that constrains the characters between A to F and 0 to 9 at the EditText. Finally, it tries to solve some of the EditText problems when applying these constrains.
The application in this post has been tested on Android 2.1, 2.3 and 4.0.
So, here’s a screenshot of the example project application in action:
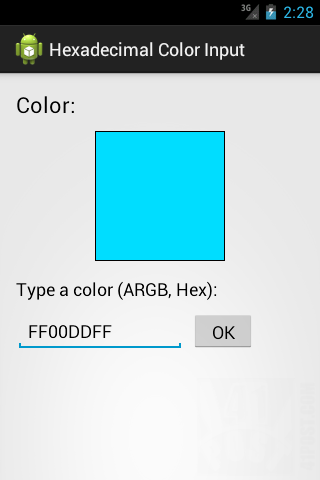
A screenshot of the example project. It’s available for download at the end of the post.
There’s nothing out of ordinary about the XML that has been used to create this interface. You can find it on the example project. However, there are two attributes the EditText has that are worth mentioning. Here they are:
<!-- ..... -->
<EditText
	android:inputType="textCapCharacters|textNoSuggestions|textVisiblePassword"
	android:maxLength="8" />
<!-- ..... -->
The first value assigned to the android:inputType attribute forces the EditText to show the soft keyboard with the characters already capitalized. The second attribute prevents the soft keyboard from displaying suggestions. The third and last one ensures that suggestions and the auto-correct feature is disabled, since this EditText field is being assigned as a visible password field. The android:maxLength attribute sets the maximum number of characters allowed in this EditText. It has been set to 8, since the color is made up of eight hexadecimal characters.
To preview the color, an ImageView is being used. It has been assigned a 1×1 pixel opaque white image (0xFFFFFFFF) at the XML file and it’s being stretched to match the ImageView size. That way, it’s possible to preview the selected color including the opacity information by multiplying it with the white image. For more information on multiplying an image with a color please refer to this other post: Android: Change color of the standard button inside Activity.
And here’s the Activity code:
package fortyonepost.com.hexadecimalcolorinput;

import android.os.Bundle;
import android.app.Activity;
import android.graphics.PorterDuff;
import android.text.Editable;
import android.text.TextWatcher;
import android.view.Menu;
import android.view.MenuItem;
import android.view.View;
import android.view.View.OnClickListener;
import android.view.WindowManager;
import android.widget.Button;
import android.widget.EditText;
import android.widget.ImageView;
import android.widget.Toast;

public class MainActivity extends Activity
{
	//The ImageView that displays the hexadecimal color
	private ImageView iv_colorpreview;
	//The EditText field, that receives a hexadecimal color as input
	private EditText et_hexColorInput;
	//A button to confirm any color changes
	private Button bt_ok;

	@Override
	protected void onCreate(Bundle savedInstanceState)
	{
		super.onCreate(savedInstanceState);
		setContentView(R.layout.activity_main);

		//Inflate the three previous Views with the information found at the 'activity_main.xml' file
		this.iv_colorpreview = (ImageView) this.findViewById(R.id.iv_colorpreview);
		this.et_hexColorInput = (EditText) this.findViewById(R.id.et_hexcolor);
		this.bt_ok = (Button) this.findViewById(R.id.bt_ok);

		//This prevents the EditText View from automatically receiving focus on Activity startup
		this.getWindow().setSoftInputMode(WindowManager.LayoutParams.SOFT_INPUT_STATE_ALWAYS_HIDDEN);

		//Assign a TextWatcher to the EditText
		this.et_hexColorInput.addTextChangedListener(new TextWatcher()
		{
			@Override
			public void onTextChanged(CharSequence s, int start, int before, int count){}

			@Override
			public void beforeTextChanged(CharSequence s, int start, int count,int after){}

			//Right after the text is changed
			@Override
			public void afterTextChanged(Editable s)
			{
				//Store the text on a String
				String text = s.toString();

				//Get the length of the String
				int length = s.length();

				/*If the String length is bigger than zero and it's not
				composed only by the following characters: A to F and/or 0 to 9 */
				if(!text.matches("[a-fA-F0-9]+") && length > 0)
				{
					//Delete the last character
					s.delete(length - 1, length);
				}
			}
		});

		//Set what the OK Button should do, when pressed
		this.bt_ok.setOnClickListener(new OnClickListener()
		{
			@Override
			public void onClick(View v)
			{
				//Create and initialize the int 'color' with the white color.
				int color = 0xFFFFFFFF;

				try
				{
					//Get the text at the EditText field and save it in a String
					String colorValue = et_hexColorInput.getText().toString();

					/*Convert the String into a Color ARGB hexadecimal integer.*/
					color = Integer.parseInt(colorValue.substring(2), 16) +
							(Integer.parseInt(colorValue.substring(0,2), 16) << 24);
				}
				catch (Exception e) //Something went wrong while parsing the String into an Integer
				{
					//Reset the EditText field to white
					MainActivity.this.et_hexColorInput.setText("FFFFFFFF");
					//Display a toast message
					Toast.makeText(MainActivity.this, "Invalid color!", Toast.LENGTH_SHORT).show();
				}

				/*Get the Drawable displayed by the Image View (in this case, the 1x1 PNG opaque white image).
				  Clear any ColorFilters previously applied to it*/
				MainActivity.this.iv_colorpreview.getDrawable().clearColorFilter();
				//Multiply the white image with the hexadecimal color passed at the EditText field
				MainActivity.this.iv_colorpreview.getDrawable().setColorFilter(color, PorterDuff.Mode.MULTIPLY);
				//Invalidate the ImageView, forcing it to be re-rendered.
				MainActivity.this.iv_colorpreview.invalidate();
			}
		});
	}

	@Override
	public boolean onCreateOptionsMenu(Menu menu)
	{
		// Inflate the menu. This adds items to the action bar if it is present.
		getMenuInflater().inflate(R.menu.main, menu);
		return true;
	}

	@Override
	public boolean onOptionsItemSelected(MenuItem item)
	{
        switch (item.getItemId())
        {
        	//If the only button at this options menu is pressed
        	case R.id.menu_settings:
        	{
        		//Remove any kind of color filter
        		this.iv_colorpreview.getDrawable().clearColorFilter();
        		//Render the ImageView again
        		this.iv_colorpreview.invalidate();

        		//Reset the color to its initial value (White = 0xFFFFFFFF)
        		this.et_hexColorInput.setText("FFFFFFFF");

        		return true;
        	}
        	default:
        	{
        		return super.onOptionsItemSelected(item);
        	}
        }
	}
}
At the top of the Activity, three member variables are being declared. They are, respectively an ImageView, an EditText and a Button (lines 21 through 25). These elements are the ones on the screenshot at the beginning of the post. They are being initialized at the onCreate() method, by inflating the data from the ‘activity_main.xml‘ file (lines 34 through 36).
Then, line 39 gets a handle to the current window, and flags the system to hide the soft keyboard upon the start of the Activity. Normally, the focus is automatically set to the EditText as the application launches, causing the soft keyboard to be displayed. This line prevents this behavior from happening, as the soft keyboard can block some GUI elements on devices with small screens. Plus, it gives time for the user to understand the application’s interface.
Next, a TextWatcher is assigned to the EditText. The TextWatcher is a interface with methods that are called when the text on the EditText is changed (line 42). We are only interested on the last one; afterTextChanged() (line 52). As the name suggests, this method is called after a single or a sequence of characters is typed at the EditText. This is where we can place the logic to allow only allow a limited set of characters on an EditText.
Inside the mentioned method, the text on the EditText is stored as a String (line 55). The length of this String is stored at the length variable (line 58). Then, a if statement checks whether the length of the text in the EditText is bigger than zero and if it doesn’t match any of the characters passed as the parameter to the matches() method, which takes a regular expression as a parameter (line 62). Case it doesn’t, the last typed character is deleted (line 65). In other words, if the String on the EditText doesn’t contain the characters A through F (capitalized or not) and/or 0 through 9, the last character typed by the user is deleted. This happens in a instant, so the EditText appears not the accept the invalid characters beside the ones defined on the regular expression.
An OnClickListener for the bt_ok button is defined at line 71. This is where the actions that must be performed when the button is pressed are defined. For this example, the text at the EditText must be parsed as a hexadecimal Integer and multiplied with the white Drawable at the ImageView, so that the selected color can be displayed to the user. To do exactly that, a new Integer variable is created, aptly named color. It’s initialized with the opaque white color value (0xFFFFFFFF) (line 77).
Parsing a String to a hex Integer can be done by calling the static Integer.ParseInt() method. Because the operations made by this method isn’t always successful, it throws exceptions if it fails, so it needs to be surrounded with a try/catch block (lines 79 through 94). The most common exception thrown by the Integer.ParseInt() method is the NumberFormatException, caused mainly due to invalid characters on the String trying to be parsed as an Integer (eg.: the character ‘h’ isn’t part of the hex representation, so the ParseInt() method fails).
At the try code block, the text typed on the EditText field is stored at the recently created colorValue String (line 82). Afterwards, colorValue is parsed as a hex color Integer at lines 85 and 86. Let’s have a look at those lines again:
color = Integer.parseInt(colorValue.substring(2), 16) +
	(Integer.parseInt(colorValue.substring(0,2), 16) << 24);
Those two lines are parsing the colorValue String in two parts, because the the Integer.ParseInt() method expects to parse a String with a maximum number of six hexadecimal characters to generate a 24 bit hexadecimal Integer. So, the String is parsed into two parts: first the RGB channel values at line 85, and secondly, the part of the String which corresponds to the alpha channel (the first two characters) at line 86. These values are added together. The specific parts of the colorValue String are being returned by calling the substring() method with the correct parameters.
Also, the Integer.ParseInt() method that’s being used is the one that takes two arguments. The first one is the String that needs to be converted into an Integer, the second one is an Integer named radix — the numeric base which to parse the first argument. A radix of 10 will parse the String to an Integer using a decimal base, and 16, the one used above, makes for a hexadecimal conversion.
Furthermore, at line 86, there’s a bit-shifting operation taking place on the alpha channel value, shifting 24 bits to the left. That’s because the alpha channel occupies this position at the hexadecimal Integer. This operation is necessary due to the fact that the colorValue String is broken into two parts and each part is being parsed individually.
To exemplify how this works, consider the opaque black color given by 0xFF000000 as an example. The alpha part of the String is FF. After parsing it into a hexadecimal Integer, you will get the decimal value 255. But since the position of that the alpha bits need to occupy on the hex integer (the first pair of values), they need to be shifted 24 bits to the left. Remember, the original color was 0xFF000000 (Decimal: 4278190080) and not 0x000000FF (Decimal: 255). After these conversions are done, the results are stored at the color variable.
It’s way out of the scope of this tutorial to explain in detail how bit shifting and bitwise operations work. To better understand it, please take a look here and here.
Moving on to the rest of the code, the catch block is executed when an exception is thrown while parsing colorValue to a hex Integer. Inside this block, the text on the EditText is reset to “FFFFFFFF” (opaque white) and a Toast message is displayed to the user telling that the input typed is invalid (lines 88 through 94).
Still inside the onClick() method, the iv_colorpreview Drawable is obtained by the getDrawable() method and any ColorFilter previously applied to it is removed (line 98). This Drawable is the 1×1 opaque white pixel image. The iv_colorpreview drawable is obtained again by the getDrawable() method on the next line, but there, a multiply ColorFilter is applied to the Drawable by calling the setColorFilter() method (line 100). It takes two arguments, an Integer as the color in a ARGB hexadecimal format and a PorterDuff.Mode. You can think the PorterDuff.Modes as blending modes, much like defining a OpenGL blending function. The one used above is PorterDuff.Mode.MULTIPLY.
That way, the white Drawable is multiplied with the color passed on the EditText. Now, all it’s left to do is render the ImageView with the Drawable multiplied with the color. This is done by invalidating the whole ImageView at line 102, forcing it to be rendered again.
That’s it! The rest of the Activity just creates an option menu from the ‘main.xml‘ file (lines 108 through 113) and resets the color to opaque white if the single button on this Activity’s option menu is pressed (lines 115 through 138).
Don’t forget to comment! Your feedback is most valuable to us.
Downloads
Want to see more posts like this more often? Please donate by clicking at the button below:
Don't feel like donating? Alternatively, you can support the site by purchasing the FULL version of the Arrows Live Wallpaper app at the Google Play Store™:

Thanks a lot!
Be the first to leave a comment!