Unity: changing Editor settings from outside Unity
Posted by Dimitri | Nov 1st, 2012 | Filed under Programming

This post is aimed specifically at those who have opened Unity only to find out that it is crashing because of some recently added problematic script on the project. The text below shows how to circumvent this problem by enabling the ‘Always Show Project Wizard‘ option without the need to launch Unity. This tutorial will focus on how to do it on a Windows machine, with Unity version 3.5.6f4 installed. Mac Unity developers should take a look at this thread on Unity Answers.
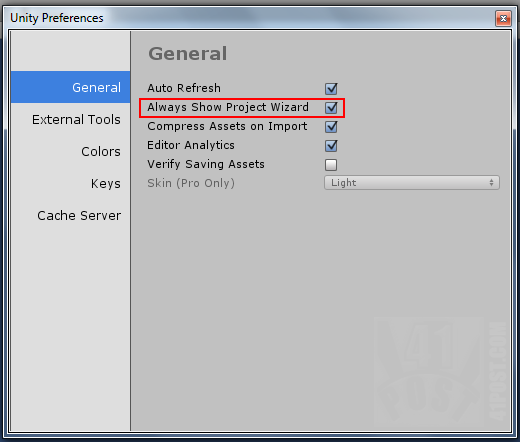
The most well known method to make Unity load straight into the Project Wizard is to hold the left ALT while double clicking on the Unity icon. As described, it will take Unity straight into the Project Wizard. That way, you can choose another project and them enable the ‘Always Show Project Wizard at Startup‘ option by selecting Edit->Preferences.

Enable this option and Unity will open the Project Wizard every time it’s started.
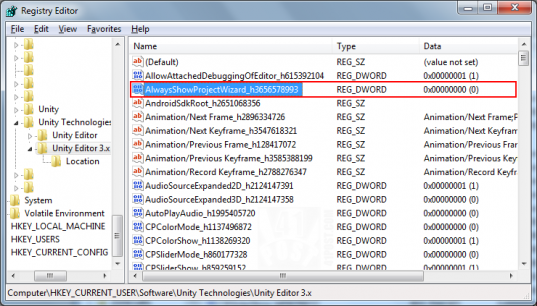
After this option is set, the Unity Editor will launch the Project Wizard instead of the last opened project. If that’s enough to solve your problem, there’s no need to read the rest of this post. But what if creating a new project isn’t possible so you can’t even reach the Unity Preferences screen? And what if the other projects on the project list take too much time to load, or if the current machine doesn’t have the necessary resources to load another project that’s on the list? There’s another way to do it. First, you’ll need to open Windows Registry Editor by pressing the Windows Key + R. Then, type regedit and hit enter. The Registry Editor should open. Now, navigate to the following folder:
HKEY_CURRENT_USER\Software\Unity Technologies\Unity Editor 3.x
Now, find the key AlwaysShowProjectWizard_h3656578993:
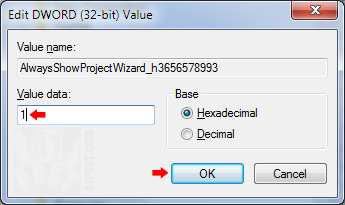
After finding it, double click it and set it’s value to 1 and click on the OK button:

Set the value of the key to one and confirm the changes by clicking at the OK button.
That’s it! Now, if you open Unity, it will launch the Project Wizard instead of the last opened project.
On a side note: before closing the Registry Editor, take a look at the other keys associated with the Unity Editor. Some of them could come in handy, like the one that allows to set the last used project path, which is the kProjectBasePath_hxxxxxxxxxx key, where xxxxxxxxxx is a series of ten consecutive numbers.
Also the keys from RecentlyUsedProjectPaths-0_hxxxxxxxxxx to RecentlyUsedProjectPaths-19_hxxxxxxxxxx allows the customization of the path of the previously opened projects list at the Project Wizard. Just change their values. Again, xxxxxxxxxx is a series of ten consecutive numbers.
What do you think? Do you have any other Unity tips you would like to share? Leave your thoughts on the comments!
Be the first to leave a comment!


