Unity: How to make an overview map
Posted by Dimitri | May 19th, 2011 | Filed under Programming
This Unity tutorial explains the required steps to create a map that displays the level in a top-down view. For a real-time, precise map, an orthographic camera can be placed on the top of the map and set to exclusively render a specific layer. However, this post isn’t about creating a precise map, instead it shows how to create a stylized one. A Unity project with everything explained here is available for download at the end of this tutorial.
The first step is to create a plane by clicking on GameObject->Create Other->Plane. Resize it underneath your level, making it have the same size of your scene, not bigger or smaller, just enough to fit all of the elements inside it.
To make things easier to understand, in this tutorial, the examples will use the plane as the only element in the level. Now, it’s time to start doing some math to obtain some values that will be important for the scripts and for the map’s background to be correctly rendered. Open the plane at the Inspector and divide the X Scale value by the Z Scale, this way, obtaining the plane’s width/height ratio.
The next step is to launch Photoshop or any image editing software. Make an image that will be the background of the map with the same ratio and customize it any way you see fit. The size doesn’t matter, as long as it is smaller than the screen resolution and the ratio is the same as the one calculated above.
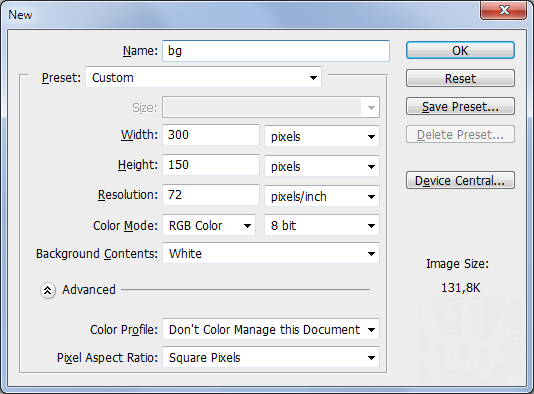
This image is going to be 300x150, meeting the 2:1 ratio requirement.
Save this image and drag and drop it inside Unity, into the Inspector tab. Also, import other images you would like to display in the map into Unity as well. Now, create a GUISkin object, by right clicking the Project tab and selecting Create->GUISkin. Add the overview map background and any other image made with the image editing software as elements of the Custom Styles array. Insert this images in the Normal state Background slot, like this:
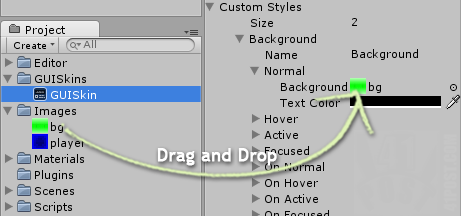
Besides the background, this example has only one extra element to be displayed on the map.
The third step is to open this link and download the ShowSize script. Add this script to your ‘Editor’ folder under the Inspector tab. If there is no folder with that name, just create it and then place the script inside it:
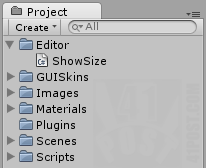
The 'ShowSize' script inside the 'Editor' folder.
Open this script window by clicking on Windows->Show Size. A new window will pop up. Select the plane on the scene, and Show Size script will display its size in the X, Y and Z axis. Write down these values as they are going to be important to the scripts explained below. With these values stored somewhere, create a new Cube game object (GameObject->Create Other->Cube). Align its center at each of the plane’s edges, writing down X and Z coordinates. These values are also relevant to the code.
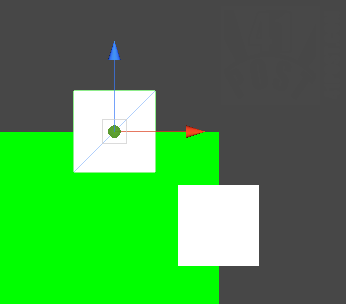
Center the cube at the 4 edges of the plane. Take note of its position.
Finally, let’s write some scripts! The first one is a simple GUI script that only renders the map’s background:
using UnityEngine;
using System.Collections;

public class GUIBackground : MonoBehaviour
{
	//the GUISkin
	public GUISkin guiSkin;

	void OnGUI()
	{
		//Set the depth to one or a greater value
		GUI.depth = 1;

		//begin GUI group, with the same size as the GUI background image
		GUI.BeginGroup(new Rect(20,20,300,150));
		//render the GUI background image
		GUI.Label(new Rect(0,0,300,150),"",guiSkin.customStyles[0]);
		//close the group
		GUI.EndGroup();
	}
}
The above code should be self explanatory. Line 12 pushes this GUI to the bottom of the GUI layers. Line 15 starts a new GUI group, that will render the map 20 pixels away from the top left border of the screen. The GUI group must have the same size as the GUI background image.
This other script will display, on the map, the location of the Game Object it’s attached to.
using UnityEngine;
using System.Collections;

public class PlayerGUI : MonoBehaviour
{
	//the GUISkin
	public GUISkin guiSkin;
	//this game object's transform
	private Transform goTransform;

	void Awake()
	{
		//obtain the game object Transform
		goTransform = this.GetComponent<Transform>();
	}

	void OnGUI()
	{
		//set the depth to zero or any value smaller than the one at the above script
		GUI.depth = 0;
		//begin GUI group, with the same parameters at the above script
		GUI.BeginGroup(new Rect(20,20,300,150));
		//15 is the Map's Background width in pixels divided by the plane's width
		GUI.Label(new Rect((goTransform.position.z*15)-68.213905f,(goTransform.position.x*15)-237.28775f,15,15),"",guiSkin.customStyles[1]);
		GUI.EndGroup();
	}
}
This script is a little different since it uses the game object’s X and Z position to draw it’s representation in the overview map at the correct position. Line 24 makes it all happen. The X and Z positions are multiplied by 15 because it corresponds to the map background’s image width (in pixels) divided by the plane’s size at the Z axis, so: 300/20 = 15. It’s the map image/plane ratio. The same value can be found by multiplying the map background’s image height (also in pixels) divided by the plane’s size at the X axis.
The 68.213905 value is the position of the Cube game object at the Z axis when it’s centered on the left border of the plane multiplied by 15, plus the game object’s half width also multiplied by 15. The 237,28775 value is the same, except it correspond to the X position of the Cube game object, when it is was centered at top border of the plane. This image explains it better:
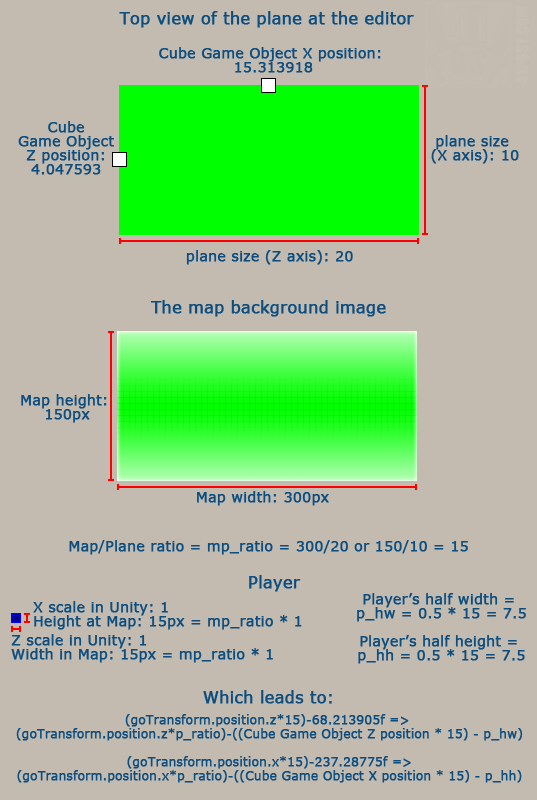
Image that explains the values found on line 24.
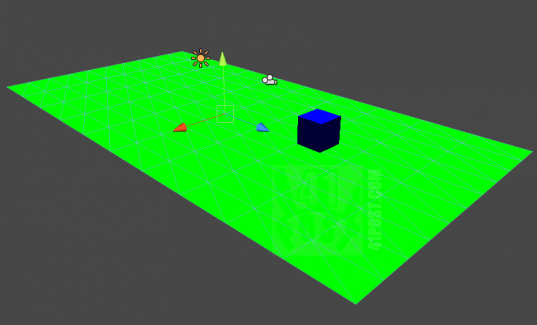
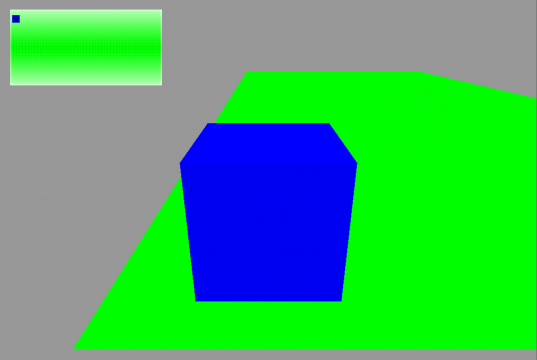
That’s it. Here’s a image of what the example project looks like:



Thanks for another GREAT tutorial, this one is going to be very helpful to me in the near future,thanks!
I hope it was clear enough. Thanks for the feedback!
Thank you for this tutorial ..
I do every thing but my cube not appear
any suggestion please
Thank you again
that really helpful …………
i apply it right on my project
but there is still a problem >>>>
i want the overview map to be like there is Direction (North , south , east and west)
so when i move up the the character pin on map goes north and when i go east the it goes right and so on ……
please can you help me in this …….. thnx in advance :)
GUI.Label(new Rect((goTransform.position.x*0.33333333f)+285f,(goTransform.position.z*0.33333333f)+250f,30,30),””,guiSkin.customStyles[1]);
Sir thank you very much for very informative unity3d tutorials… more power sir! ^_^
thx , this is what I’m searching